Sunday, June 21, 2020

Rhubarb Crisp for Summer Dessert


Summer is time for fruit, flowers and favorite foods. I just learned that one of our favorite foods isn't a fruit like I thought, but a vegetable! I thought the tomato was the sole claim of that confusion. I used to tell the kids in the nutrition classes I taught that if we were talking horticulture it was a fruit, and if we were talking food it was a vegetable. Rhubarb is just the opposite, a vegetable that is mostly eaten as a fruit in pies, cobblers, and often paired with strawberries. Maybe it's tartness and need for lots of sugar is what pushes it into the fruit dessert category. 
Rhubarb stalks look like red celery with large leaves. Just remember the leaves are poisonous, so only harvest the stalks. A friend gave me about 20 stalks recently, just right for rhubarb cobbler. Here's my favorite recipe that could use fresh or frozen rhubarb. 


RHUBARB CRISP

Ingredients:
6 cups rhubarb (can add blueberries to make it to 6 cups)
3 tablespoons flour
2/3 cup sugar
½ teaspoon cinnamon
Topping: 
¾ cup rolled oats
¾ cup brown sugar, packed
6 tablespoons flour
½ teaspoon cinnamon
6 tablespoons butter

Instructions: 
1.    Preheat oven to 375 degrees. 
2.    Wash and rinse rhubarb and cut into 1/2” pieces.
3.    Toss rhubarb with flour, sugar, and cinnamon. Place in a 2qt. baking dish. 
4.    In a separate bowl, combine topping ingredients with a fork or pastry blender. Sprinkle over rhubarb mixture. 
5.    Bake for 35 minutes or until rhubarb is tender and topping is golden. 
6.    Cool 5-10 minutes before serving. Top with ice cream, cream, or vanilla yogurt. 

chopped rhubarb and blueberries with sugar, flour,
 and cinnamon. Ready for topping. 

With topping, ready for baking. 


Sunday, June 7, 2020

The Not-So-Common Cabbage

This is one week's half-share of the local CSA.
One head of red cabbage and one of green. 

Cabbage - not a fancy veggie. Something I buy cabbage a few times in the winter when lettuce isn't very good (or too expensive) for salads. Cabbage makes good coleslaw. Anything else? Well, when our weekly selection of produce from our CSA (Community Supported Agriculture) included cabbage for a few weeks, I needed new ideas!

A search came up with a couple that seemed suited for summer meals. And with a thought to next winter I also froze some for soups. Besides coleslaw, I do like cabbage in vegetable soup. Freezing cabbage doesn't sound like it would be too successful since it does have a high water content and freezing would make the cell walls break down resulting in a limp, not crisp, product. But for soup it is cooked to a tender and limp state, so freezing seems like a possibility. I cut the cabbage into small wedges, leaving a bit of the core in each to hold it together. Then blanched the wedges in boiling water for 90 seconds followed by 90 seconds in ice water. After draining the wedges I packed them into a freezer plastic bag for the freezer. We'll look forward to that addition to hardy soups next winter.

The new recipes I tried that we liked were Baked Cabbage and Cabbage Rolls. Baked Cabbage sounded unusual and strange - but surprisingly it is very good. I changed both recipes to shorter baking times, I found with really fresh and tender vegetables the baking time can be reduced. Cooking with veggies is more of an art of what works and what you like, not like the science of baking where careful measurements and times are more critical. So sometimes I take the recipe as a 'suggestion'.

Cabbage wedges ready to be baked.

Baked Cabbage: Cut into wedges and put on an oiled roasting pan. Drizzle with olive oil (I use a basting brush to spread the oil in the bottom of the pan then over the top of the cabbage). Sprinkle with salt and pepper and brush with olive oil. Lay cut bacon pieces (uncooked) on top of the cabbage. Drizzle with a little melted butter. Roast at 450 degrees, covered with foil for 15-20 minutes. Uncover and roast until the cabbage is golden brown and tender. The original recipe instructed a total of 60 minutes of roasting time. With fresh cabbage, ours was tender and even crunchy at the edges in about 30 minutes. You won't believe how good this is! (Could be the olive oil, bacon, and butter!)

Baked - crispy and a little too brown! 


Cabbage rolls ready for baking
Stuffed Cabbage Rolls

I adapted a recipe from thekitchenwhisperer.net to make a smaller amount and shortened the baking time.
Cabbage leaves - I pulled large leaves off the outside and cooked 10. You could cook the whole head (remove core first). Cook in boiling water for 3 minutes until leaves are softened. Cut away the thick center stem from each leaf without cutting all the way through.
Meat mixture - this is basically a meat loaf mixture.
       1 ½ pound ground beef (or 1 pound ground beef + ½ pound ground pork)
       1 medium onion, chopped fine, or 1 Tablespoon minced dried onion
       3 tsp. minced garlic
        1 tsp. kosher salt
       ¾ tsp. ground black pepper
        1 tsp. parsley flakes
        1 large egg
        ¼ cup ketchup
         about ⅓ can tomato soup (use the rest of the can to pour over the rolls)
Mix all ingredients together.
To assemble cabbage rolls: Lay a leaf down with the cut edge facing you (where the stem was) and place about ½ cup meat mixture in the middle. Fold the edges over the meat and roll the cabbage up like a burrito. Repeat until all the leaves are stuffed. If you have extra meat just roll it up as meatballs and place it in the baking pan with the stuffed cabbage. Pour the rest of the can of tomato soup over the cabbage rolls.
Bake covered for about 1 hour, until the internal temperature of the cabbage roll/meat is 165 degrees and the cabbage is tender.
Eating local - roasted carrots, beets, and potatoes from CSA,
tossed salad with radishes from CSA, cabbage rolls - cabbage
from CSA and beef from our ranch. 

I even found a quote about cabbage I like. From Mark Twain, "Training is everything. The peach was once a bitter almond; cauliflower is nothing but cabbage with a college education." Humble as the cabbage may be, it can be tasty in a variety of ways.


Saturday, May 9, 2020

Ice Cream Comfort

During this stay at home time we're all looking for comfort foods. At our house a favorite is homemade ice cream. We started the stretch of many home meals with a birthday dinner the second week of March including home made ice cream. Last week we celebrated it being another week and we needed something special. Don't we all feel like that sometime?
The first batch of ice cream was made in a traditional home (White Mountain) ice cream freezer that my daughter and son-in-law received for a wedding gift. So they were in charge of the ice and churning. The second batch took a different turn when the local convenience store didn't have ice. It 'aged' a day in my refrigerator while my the cylinder for my tabletop ice cream maker froze in the freezer. I've had this electric ice cream maker several years and often use it for smaller batches. It uses about 3 cups of ice cream mix, compared to the traditional freezer which uses about 6 cups. Just when I though this recipe couldn't be improved I tried strawberry. To use the remaining half-and-half and whipping cream, I added strawberry soda pop to equal 3 cups and while mixing put in about 1 cup chopped frozen strawberries. The Best!

I've experimented and read with various tips, and here's what I've found:
* This recipe below is the absolute best one I've come across! And we have lots of eggs so are well supplied for making it. ( a future blog on using egg whites!) The farm fresh eggs we have never get 'pale in color' as there recipe calls for, but give an off white tint to the vanilla ice cream.
* "Aging" the mix in the refrigerator for 24 hours develops the flavor.
* You can serve it 'soft serve' style just out of the ice cream freezer, or put it in a container to freeze solid in your freezer. Our family likes it soft serve, but many like the flavor that develops from a hard freeze.
* Using vanilla paste is a taste changer! It is a concentrated vanilla extract with the consistency of maple syrup or liquid glue. It gives a bright bold vanilla flavor that is delicious. One tablespoon equals one vanilla bean (which the recipe originally called for).
* Tempering the egg yolks is important, pour a bit of the heated half-and-half mixture into the egg yolks, whisking as you pour. This warms the egg yolks gradually so they can be poured into the hot mixture without cooking into lumps.
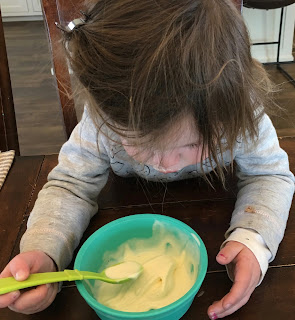
The Birthday Boy enjoys this part of
homemade ice cream best. 
From the oldest to the youngest, we all
enjoy ice cream! 


ICE CREAM – VANILLA BEAN ICE CREAM

Ingredients:
1 whole vanilla bean, split and scraped (1 Tbs. vanilla paste)
3 cups Half-and-Half
2 cups sugar
8 whole (up to 9) Large egg yolks
3 cups heavy cream

Directions:
Heat half-and-half and 2 cups sugar I a saucepan over low heat, adding vanilla to the mixture. Turn off heat when mixture is totally heated. 
Beat egg yolks by hand or with an electric mixer until yolks are pale yellow and slightly thick. Temper the egg yolks by slowly drizzling some of the half-and-half mixture unto them, whisking constantly. After that, pour the egg yolk/half-and-half mixture back into the pan contain the rest of the half-and-half/sugar mixture. Cook over low to medium-low heat until quite thick, stirring constantly. Drain custard (if you used a vanilla bean) using a fine mesh strainer. Pour into a bowl with the heavy cream. Stir to combine. 
Chill mixture completely, then freeze in an ice cream maker until thick. Place container in freezer to harden for at least eight hours. 


Monday, April 20, 2020

Ham Salad Spread - after Easter Treat


One of the things I liked best about Easter dinner was the left over ham. I'd been wanting ham salad sandwiches and after a couple of meals of leftover ham and the sides that went with it, we were ready. This recipe for Ham Salad Spread will make a good spread for sandwiches all summer when you want a lighter meal and a change from the usual deli meat sandwiches. You could even serve it on a lettuce leaf as a salad itself.
Besides tasting good, it is easy to prepare. Don't have left over ham? Use some cubed ham from the grocery store, already cooked. Want a smaller amount? Just reduce the ingredients, maybe one egg, a little chopped celery and pickle relish, a dash of mustard, and enough mayonnaise to make the consistency spreadable.

HAM SALAD SPREAD


3 cups ground fully cooked ham
2 hard-cooked eggs, chopped
2 tablespoons finely chopped celery
4 teaspoons sweet pickle relish
1 cup mayonnaise
1 tablespoon prepared yellow mustard

Directions: Mix ham, eggs, celery, and pickle relish together in a bowl. Combine mayonnaise and mustard together in a separate bowl, pour over ham mixture. Stir to coat. Refrigerate until serving time. 
Ham was the star of Easter dinner, but the other dishes
were great also. 

Tuesday, April 7, 2020

Fabric, Food, and Friends


Just before the StayAtHome directive came for Kansas, a small group of friends gathered at the local quilt shop on Sunday afternoon for sewing, visiting, and snacking. We knew many of our activities were being cancelled and this might be (and did turn out to be) a last gathering for a while. Its hard to say which we enjoyed most - fabric, food, or friends - but we're glad we had that afternoon. 

My pan to take was Veggie Pizza, one of my favorites, but something I don't make for us at home. It was a popular treat and when the afternoon was over we traded leftovers. So I came home with only a few pieces of the veggie pizza, some Barney Stone cake (pound cake covered with peanuts), and chocolate chip cookies. All very good. With those goodies, it is amazing we got any sewing done, but we did. 

This Veggie Pizza is easy to assemble, and I think it helps to do the crust earlier in the day so it is ready. The choice of toppings is yours, your favorites or what ever you have on hand. If you want to reduce the calories you can use low-fat sour cream and cream cheese. 


Veggie Pizza

2 (8 oz) packages refrigerated crescent rolls

1.    Preheat oven to 350 degrees. Spray a jellyroll pan with no-stick cooking spray. 
2.    Pat crescent roll dough into a jelly roll pan. Press the edges together to form a solid crust. Let stand 5 minutes. Pierce with fork. 
3.    Bake for 10 minutes, let cool. 

1 cup sour cream
1 (8 oz) package cream cheese, softened
1 teaspoon dried dill weed
¼ teaspoon garlic salt
1 (1 oz) package ranch dressing mix

4.    In a medium size mixing bowl, combine the sour cream, cream cheese, dill weed, garlic salt and ranch dip mix. Spread this mixture on top of the cooled crust.

Topping options: Assorted chopped raw veggies: celery, broccoli, small onion, radishes, bell pepper, mushrooms, tomatoes.  Grated carrot, sliced black olives. Shredded cheese.

5.    Top with favorite toppings. Cover and let chill. Once chilled, cut into squares and serve. 
Now we do our visiting while sewing by texting! 


Tuesday, March 31, 2020

MORNING GLORY MUFFINS

These muffins are a hit! I have no idea why they're called "morning glory muffins" except that they would be a great breakfast treat. I made them this afternoon and there may not be any left by breakfast! The ingredients remind me of a cross between a hummingbird cake and a carrot cake in muffin form. 
The original recipe is from Ina Garten/Food Network, I altered it to make part of the flour whole wheat and used craisins instead of raisins. 
The batter is colorful and yummy looking even before baking - see the photos at the end of the post. 
It goes together easily and quickly. The grating of carrots and apple is the most time consuming. I took advantage of the food processor instead of a box grater and grated them the night before when I was also grating carrots for another recipe. 


MORNING GLORY MUFFINS                            


Ingredients: 
1 cup vegetable oil, plus extra for the pan
3 extra-large eggs
2 teaspoons pure vanilla extract
2 cups grated carrots
1 Granny Smith apple, grated
1 (8-oz) can crushed pineapple, drained
½ cup pecans, roughly chopped
½ cup sweetened shredded coconut
½ cup craisins or raisins
1 cup whole wheat flour
1 ¼ cup all-purpose flour
1 ¼ cup sugar
1 tablespoon ground cinnamon
2 teaspoons baking soda
1 teaspoon kosher salt

Directions:
Preheat oven to 350 degrees F. and arrange two racks evenly spaced in the oven. Line two muffin pans with paper muffin cups. 
In a large bowl, whisk together the eggs, oil, and vanilla. Add the carrots, apple, pineapple, pecans, coconut, and raisins and stir together.
In a medium bowl, sift together the flours, sugar, cinnamon, baking soda, and salt. Add the dry ingredients to the wet ingredients and stir just until combined. Scoop the batter with a standard (2 ¼ -inch) ice cream scoop into the prepared muffin cups. 
Bake for 30-35 minutes, until a toothpick comes out clean. Place the pans on a baking rack to cool and serve the muffins warm or at room temperature. 

 
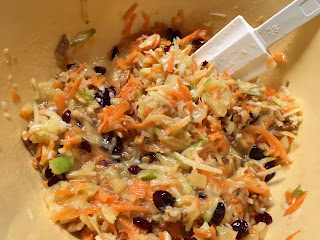
The batter before the dry ingredients - it is
very colorful! 

Gently mix the dry ingredients in just enough to
completely moisten and mix all the ingredients. 

Sunday, March 29, 2020

Top Secret Chocolate Cake

The rainbow sprinkles add a festive touch.
Favorite part for the grand girls! 
More comfort food time. During this Stay-At-Home season there is lots of time for cooking and baking - and eating. With the warmer weather we should be able to be outside taking walks to balance the extra calories. So here is an easy and pretty cake to celebrate your family. 

This recipe is from Pioneer Woman, one of my favorite sources. Her version adds a simple chocolate ganache topping made with ½ cup heavy cream and ⅔ cup semisweet chocolate chips. (heat cream until just bubbling.  Add chocolate ships to a small bowl and pour the hot cream over the top. Let sit for 1 minute, then mix until smooth.) This did not work for me, a sad waste of cream and chocolate chips! So I found an even easier way - ready-made frosting, that is included in this recipe. 

TOP SECRET CHOCOLATE CAKE


Ingredients:
One 15.2 oz box dark chocolate cake mix
1 cup whole milk
½ cup (1 stick) melted salted butter
3 large eggs, beaten
1 cup semisweet chocolate chips
1 tablespoon vanilla extract
Ready-made chocolate frosting

Directions: 
1.    Preheat oven to 350 degrees F. Grease a 10-cup Bundt pan with baking spray. 
2.    Mix together cake mix, milk, butter, eggs, chocolate chips and vanilla in a large bowl until completely combined. Pour into the prepared Bundt pan and bake until a toothpick inserted in the center comes out clean, about 40 minutes. 
3.    Let the cake cool for about 15 minutes before turning it out onto a cooling rack. Allow to cool completely an additional 20-25 minutes. 
4.    Topping: soften ready-made chocolate frosting in the microwave until  pourable but thick. 
5.    Transfer the cake to a cake stand or serving platter and pour the frosting over the top, allowing it to drip down the ridges. Sprinkle with rainbow sprinkles and serve. 

We have farm fresh eggs from Daughter & S-I-L. This
is 3 large eggs! It was a rich cake.