Sunday, September 30, 2018

Judging Yeast Breads

Everyone thinks it would be a fun and tasty job to judge 4-H foods at the state fair. Let me tell you, it is harder than it looks! This year I judged yeast breads, and thanks to helping with National Festival of Breads and the Kansas Wheat Commission, it was a fun and tasty job.

This blog will share some photos of the variety of breads I judged and give you some tips for your own baking with yeast breads. When judging, the judge looks for certain standards for each product as well as a product that is so unique and/or perfect that is stands out from the rest. The advice I give 4-Hers is that you probably won't win top awards with chocolate chip cookies or white dinner rolls or banana quick bread. Those are the most common things cooks enter and their entry has a harder time being noticed.

There is a complete "What Happened to the Yeast Bread?" chart at www.homebaking.org. It outlines problems such as too much or too little volume, pale or dark color, cracked or blistered crust, coarse or heavy or dry and crumbly texture, or poor flavor. The Kansas Wheat Commission also has good references and recipes (http://nationalfestivalofbreads.com/recipes)  Check out those sites for specific concerns, but here are some general tips for the best yeast bread product:

* yeast - measure accurately, use correct temperature for water or flour mixing, be sure yeast if fresh.
* Check the oven temperature. Use an oven thermometer to be sure it is correct and place the bread in the center of the oven.
* Measure accurately! Too much sugar or salt can greatly affect the outcome. This is not a time to try to adjust the recipe. Flour should be 'fluffed' with a whisk to lighten it and measure more correctly. Weigh ingredients for the most accurate measurement.
* Temperature is very important with yeast breads - for the yeast to dissolve, for the bread to rise, as well as baking.
* Kneading is also important. Kneading develops the gluten and helps distribute the ingredients. Under kneading or mixing will give you a heavy textured bread or a crumbly and dry loaf.
* Careful shaping gives the bread an attractive appearance. Judges look for dinner rolls that are the same shape and size. Weighing the dough when making the rolls is a good way to achieve this. Loaf breads are rolled out like you might for cinnamon rolls, then rolled into a loaf shape with the ends tucked under. Be sure to roll tightly or there will be holes in the loaf.

There were several Challah breads - quite a challenge for 4-Hers. 


Multigrain Sourdough Boule

This was one of the most unusual. Bird Seed Bread.
The topping is assorted seeds or grains such as millet, poppy seeds, sesame seeds. 

Poppy Seed Twist loaf was another method of
a shaped loaf. 


Monday, September 24, 2018

How do you like your eggs?


What do you have when you combine eggs with bits of meat, cheese, and vegetables?  Omelet? Quiche?  Frittata? Fancy scrambled eggs? All of these answers could be correct, but the methods of preparation makes the differences.
Omelets are popular and are made by cooking eggs in a shallow pan and folding the extra ingredients into the almost done egg mixture. Quiche is an egg custard with extra ingredients added, usually in a pie crust. It is baked in the oven. Frittatas are a creamy egg custard with the eggs mixed with cream and vegetables, meat and cheese added. It is made in a heavy skillet that cooks both on the stove top and in the oven.
Frittata is a popular egg preparation now and one that friends and I recently enjoyed when quilt-tripping to visit a friend in Denver. Our friend and her neighbor not only entertained us with a beautiful Sunday morning recital of classical duets played on a baby grand piano,  they also prepared a delicious brunch for us featuring a frittata.
Doesn't this look like a delicious brunch? It was! 


You can go shopping for special fresh ingredients of bell peppers, mushrooms, asparagus, tomatoes, and spinach for your frittata or you can look in the refrigerator and see what you have that needs to be used. Throw in a few chopped vegetables, and brown some meat and a frittata can be on the table in 20 minutes. The recipe I use is a ratio using whatever ingredients you have. For every six eggs, use 1/4 cup heavy cream, 1 cup cheese, and 2 cups total vegetables and meat. You'll need a heavy skillet such as a cast iron skillet or an oven-safe non-stick skillet. If your skillet isn't non-stick, be sure to use extra oil so the eggs don't stick to the pan.

The steps are simple:
1. Preheat the oven to 400 degrees with a rack set in the center of the oven.
2. Mix the eggs and cream with 1/4 teaspoon freshly ground pepper and 1 teaspoon kosher salt.
3. Cook and drain the meat (bacon or sausage) leaving some fat in the skillet.
4. Saute the onions, green peppers, and other vegetables, starting with those that take the longest time to soften.
5. Wilt the spinach and add any fresh herbs you want to use. Cook and stir these for 30 seconds to 1 minute or until spinach wilts. Add the meat back in the pan and stir to distribute.
6. Add cheese and let it just start to melt.
7. Pour the egg mixture over the vegetables and meat and cook for a minute or two until the edges of the egg start to set.
My frittata at home in a cast iron skillet. 
8. Bake the frittata in the oven until the eggs are set 8 - 10 minutes (or longer for a big pan of frittata). If you'd like to brown and crisp the top, set the frittata under the broiler for a minute or two at the end of the cooking time.
Let set in the pan 5 minutes before slicing into wedges to serve.


Thursday, September 6, 2018

Favorite Dessert - Coconut Cream ???


 I love coconut cream pie. When it is a choice at a church dinner, I sneak a piece out early and write my name on the plate. Since I'm still working on my pie baking skills, coconut cream pie doesn't happen very often at my house. When I found this recipe for Coconut Cream Pie Bars with a shortbread crust it sounded good. And it is! It also makes several more servings than a pie so it would make a good dessert for a group. 

COCONUT CREAM PIE BARS


Ingredients:
Crust – 
1 cup (2 sticks) butter
2 cups all-purpose flour
½ cup powdered sugar

Coconut Cream Filling – 
3 cups half-and-half
3 cups coconut milk
4 eggs
1 ½ cups white sugar
⅔ cup cornstarch
½ teaspoon salt
1 ½ cup flaked coconut
½ teaspoon coconut extract
½ teaspoon vanilla extract

Whipped Cream Topping – 
2 cups heavy whipping cream
1 tablespoon cold water (to dissolve gelatin)
1 teaspoon gelatin (for stabilizing)
3-4 tablespoons powdered sugar
1 cup coconut, for toasting

Instructions:
1.    Make shortbread crust:                                                                                
Preheat the oven to 350 degrees. Prepare a 9 x 13-inch glass baking pan by spraying with non-stick baking spray. Cut the butter into the flour and powdered sugar with a food processor (about 6 – 10 pulses) and press the mixture onto the bottom of the pan. Bake 18-20 minutes or until light brown. Set on a wire rack to cool. 
2.    Toast the coconut for the topping:                                                                          
Spread about 1 cup of coconut flakes on a baking sheet and bake with the shortbread crust for 3-6 minutes, stirring every minutes or so, until the coconut is golden brown. Spread on a plate to cool completely. 
3.    Make the coconut cream filling:                                                                  
Combine the half-and-half, coconut milk, eggs, sugar, cornstarch, and salt in a large saucepan and bring to a boil over medium-low heat, whisking constantly until it is thick and bubbling (15-30 minutes). Add coconut and vanilla extracts and the untoasted coconut (1 ½ cups) and stir. Pour this filling over the cooled crust, and refrigerate until firm, about 2-4 hours. 

4.    Make the whipped cream topping:                                                                                                 
Put 1 tablespoon cold water in a small bowl and sprinkle the gelatin evenly over the top. Let it soften for 2 minutes before microwaving for 30 seconds and whisking to dissolve the gelatin. Using a chilled bowl and beaters, whisk 2 cups of heavy cream and powdered sugar together until the cream forms stiff peaks, stopping to add gelatin mixture about halfway through. Dollop the cream over the filling and gently spread over the top. Sprinkle with toasted coconut. Chill until ready to serve. Slice into bars with a sharp knife. 

Monday, August 27, 2018

Mixing it up - Meatballs

I was looking for a summer meat ball recipe with a lighter taste. This one is it! Using ground sausage and ground beef and pineapple it is a sweet/sour taste that goes well with rice and fresh veggies. Definitely a favorite summer supper. The recipe calls the meatballs appetizers, but I made them larger and served them as the main course, two meatballs made a 3-4 ounce serving. I also altered the recipe to use more sausage and ground beef. Meatballs made a good entree for a quick meal because they cook quicker than a whole meatloaf and part of the recipe can be easily frozen if you don't want the whole amount.

PINEAPPLE APPETIZER MEATBALLS 

Ingredients:
1 can (8 oz) crushed pineapple
2 egg
¼ cup dry bread crumbs
⅛ teaspoon pepper
1 pound bulk pork sausage
1 pound ground beef

Glaze:
¼ cup packed brown sugar
¼ cup ketchup
¼ cup white vinegar
¼ cup water
2 tablespoons Dijon-mayonnaise blend

Directions:
1.    Drain pineapple, reserving juice. Place pineapple and 2 tablespoons juice in a large bowl (set the remaining juice aside for glaze). Add the egg, breadcrumbs and pepper to pineapple. Crumble sausage and beef over mixture and mix well. Shape into balls. 
      (1-inch for appetizer sized-meatballs and larger for entree meatballs)
2.    Place meatballs on a greased rack in a shallow baking pan. Bake, uncovered, at 450 degrees for 12-15 minutes or until a thermometer reads 160 degrees. 

3.    Meanwhile, in a large skillet, combine glaze ingredients and reserved pineapple juice. Add meatballs. Bring to a boil over medium heat. Reduce heat; cook and stir for 5-10 minutes or until heated through. 

Good when served with brown rice (I sautéed green and red peppers from the garden to add to the rice), fresh tomatoes, and rolls. 

Tuesday, August 21, 2018

Some More S'mores

We've had a reprieve from summer with cooler days and rain. Makes me think of fall and the foods of fall - apples, pumpkin spice, pork, and - s'mores! I've tried several S'More cookie recipes but none of them were keepers. Until I found this one while judging 4-H Foods in a neighboring county. Judging fees don't pay much, but seeing the 4-Hers and what they learn, and their recipes is rewarding. This recipe is tasty, not-too-gooey, and a real keeper! The layers of homemade graham cracker crust, milk chocolate candy bars, marshmallow creme and more graham cracker topping make a combination that is delicious.

HERSHEY’S S’MORES BARS


Ingredients:
1 cup unsalted butter, softened
½ cup brown sugar, packed
1 cup white sugar
2 large eggs
2 tsp. vanilla extract
2 ½ tsp teaspoons baking powder 
½ tsp sea salt
3 cups all-purpose flour
1 ½ cups graham cracker crumbs
3 giant Hershey’s milk chocolate bars
14 oz. container marshmallow crème or fluff

Directions:
1.    Preheat oven to 350 degrees F. 
2.    Spray a 9x13-inch glass baking dish with cooking spray. 
3.    In a large bowl, cream together butter and sugars, eggs, vanilla, baking powder and salt. 
4.    Stir in flour and graham cracker crumbs. 
5.    Divide dough in half and press half of the dough into the prepared baking dish. 
This is a sticky thick dough. It helps to moisten the
spatula with water.

6.    Place chocolate bars over dough to fit it in a single layer.
There's a reason the recipe calls for 3 giant Hersery's bars!
I bought a package of the regular large ones with 10
candy bars - not enough! 

One of these is not like the others!
Luckily I had a chocolate bar hidden away from
a past birthday celebration. 

Don't you think this special candy bar will add
a special touch? Its Russel Stover's and Powercat! 


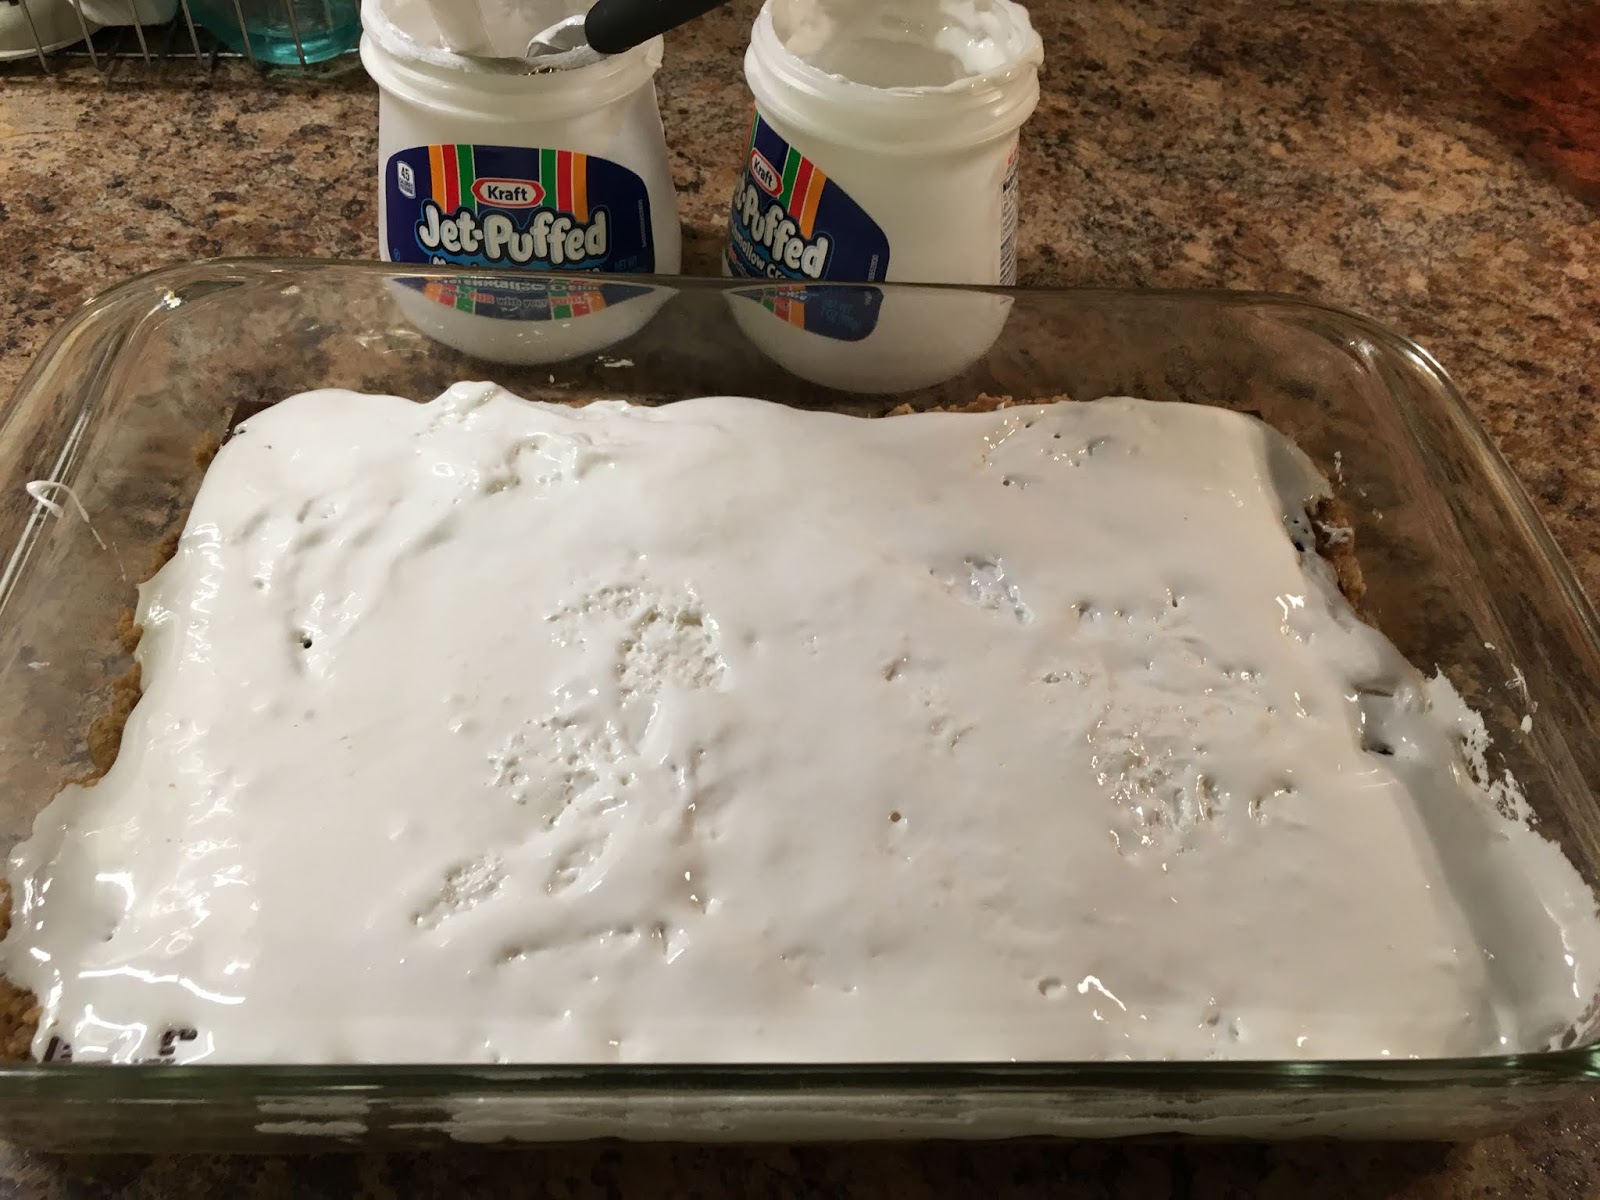
7.    Spread chocolate with marshmallow crème or fluff. (Do not use marshmallows!)
I didn't use 2 whole jars of marshmallow fluff - one had been
opened and about 1/3 used our of it. It makes a yummy
snack on graham crackers with peanut butter! 
8.    Sprinkle remaining dough over top of the fluff. 
Again - sticky! I moistened my hands and crumbled and patted
the topping on.

9.    Bake for 30-35 minutes, until lightly browned. 

10.Check for doneness with a toothpick. 

11.Cool completely before cutting into bars. It will cut easier if placed in the freezer for 30 minutes.


Saturday, August 18, 2018

Broccoli and Cauliflower Salad

Another recipe for a broccoli and cauliflower salad! They seem to be everywhere! But this one, with only 3 ingredients in the dressing is easy and tasty. Using fresh ingredients, including a fresh lemon, will make it top-notch.


CREAMY BROCCOLI AND CAULIFLOWER SALAD

Ingredients: 
1 medium broccoli head
1 medium cauliflower head
¾ cup dried cranberries (craisins)
½ cup almond slices, toasted on a dry skillet until golden
2 Tbsp honey
2 Tbsp fresh lemon juice (from 1 small lemon)
½ cup real mayonnaise

Instructions:
1.    Peel the broccoli stem and chop off the dry base. Chop broccoli into small florets and dice the stem
2.    Remove and discard cauliflower core and dice the rest. 
3.    Toast ½ cup almonds on a dry skillet over med/high heat, tossing frequently until fragrant and golden, then add to salad bowl along with ¾ cup craisins. 
4.    In a small bowl, whisk together ½ cup mayo, 2 Tbsp honey and 2 Tbsp lemon juice. Add dressing to the salad and toss well to combine. 


Wednesday, August 15, 2018

Brownie Pizza with Berries

I made this one in a tart pan
This sweet treat was a hit at a recent quilt retreat I took it to. One bite has it all -  crispy crust, creamy topping, and juicy berries. Besides delicious, it is also pretty. For the group I made it in a 9x13 cake pan and cut it into squares.


BROWNIE PIZZA WITH BERRIES


Brownie Crust:
1 brownie mix (Duncan Hines)
¼ cup water
⅓cup vegetable oil
1 egg

In a large mixing bowl, beat the brownie mix with water, oil, and egg until well blended. Note that the ingredients to add to the mix are different from the box directions. This makes the crust thinner and denser than the usual brownie. Spread in a greased pan (9x13-inch or large pizza or tart pan). Bake uncovered, in preheated 350-degree oven on center rack for 18-20 minutes or until just firm to the touch at the center of the brownie. Set aside and let cool completely. 

Marshmallow Frosting:      
½ cup unsalted butter, softened
1 cup powdered sugar
pinch of kosher salt
7 oz jar marshmallow fluff
1 tsp pure vanilla extract

In a large mixing bowl, using an electric mixer, beat butter, powdered sugar and salt until light and fluffy. Fold in marshmallow fluff and vanilla, stirring until smooth. 
      

When brownie crust is completely cooled, spread with prepared marshmallow frosting, spreading evenly to the very edges of the brownie. Top frosting with berries – sliced strawberries, blueberries, etc. I also used chunks of fresh pineapple. 
You could use strawberries and blueberries to make a flag design for a patriotic dessert. 

To serve, cut into wedges or squares with a pizza cutter. 


The 9x13 pan that went to Quilt Retreat